

Cheese commands greater respect from me because I’ve endured the ordeal necessary to make cheddar and other hard cheeses.
The instructions presume a cheesemaker whose day is unfettered by constraints. No work, family, pets, short attention span, or other real life obligations can interfere with the exacting process. And I mean exacting. Here’s one line from a typical cheddar recipe. “Raise the temperature two degrees every five minutes, cutting the curd into half-inch cubes in a slow continuous motion when the whey reaches 118 degrees.”
And then there’s aftercare. Cheddar must be pressed under increasing weights and aged at a temperature we can only achieve at my house by storing it in an attic-y closet for a few months in the winter. Needless to say, hard cheese is made infrequently around here. Too much real life going on like work, family, pets, and my tendency to behave badly.
So I make easy cheeses like mozzarella, farmer’s cheese, ricotta, yogurt cheese, and my favorite, queso blanco (also called paneer when made with lemon juice) . Well, my version is a bastardization of traditional queso blanco. Mine is firmer, easier to make, much less likely to ooze with whey. And I love to think of ways to serve it.
Queso blanco is a firm, non-melting, bland cheese. That probably doesn’t sound as appealing as provolone melting over a sandwich or a tender hunk of havarti. But it’s exactly these quality that make it so versatile. It can be rubbed with spices and oil for grilling. It can be cut in small pieces and pan fried with onions and peppers to serve over rice. It can be sliced, roasted, and topped with hot marinara sauce and Portobello mushrooms to eat with pasta or crusty bread. It can be threaded on skewers along with other kabob offerings, cut into cubes and floated in soup, marinated and breaded like a vegetarian cutlet. Throw chunks of it in curry, casseroles, creamed vegetables, anything with a flavorful sauce. Or live it up and deep fry it to serve with a dip or barbeque sauce.

Here it is pan friend in some coconut oil, served with green onions, avocado, and home made salsa. Yum.
If you want an exacting recipe I’m not the source. I’m more the subversive cook than the rule-bound cook. But don’t worry, this cheese is so easy that exact instructions aren’t required.
This is a great kitchen arts project to do with kids. It’s easy and offers a bit of cheesy magic as the whey separates from the curd.
 I use raw milk. The easiest way to get milk in its natural state in our regulation crazed era is to get your own cow.
But raw milk isn’t necessary. Any cow or goat milk will do. I tend to use skimmed (my version of skimmed is probably 1% or 2%) because we like cream in our coffee around here.
Queso Blanco (similar to Paneer)
Put a gallon of milk in a non-aluminum cooking pot and slowly heat it. This  recipe is perfect for milk that’s post dated or starting to just smell like the fridge (you know what I mean).
Stir occasionally so it doesn’t stick to the bottom of the pan.
 You want it to reach a good scald, which means a skin forming on the top. If you’re a thermometer sort of person the temp should be around 180 F or so.
Turn off the heat.

Add vinegar (either white, cider vinegar, or rice vinegar). I use quite a bit more than most recipes require in order to make a firmer cheese. For a gallon of milk I use about 2/3 to 3/4 of a cup. Or you can glug some from the jar till you see the following reaction.

This is pretty interesting to watch. The vinegar forces casein and albuminous protein out. But it looks a little bit like magic. As you stir in the vinegar, the hot milk should rather quickly separate into curds and whey.

The whey looks almost greenish.

At this point you can let the whole pot sit and rest for 10 to 15 minutes, which lets the whey collect together in a happy protein meeting.
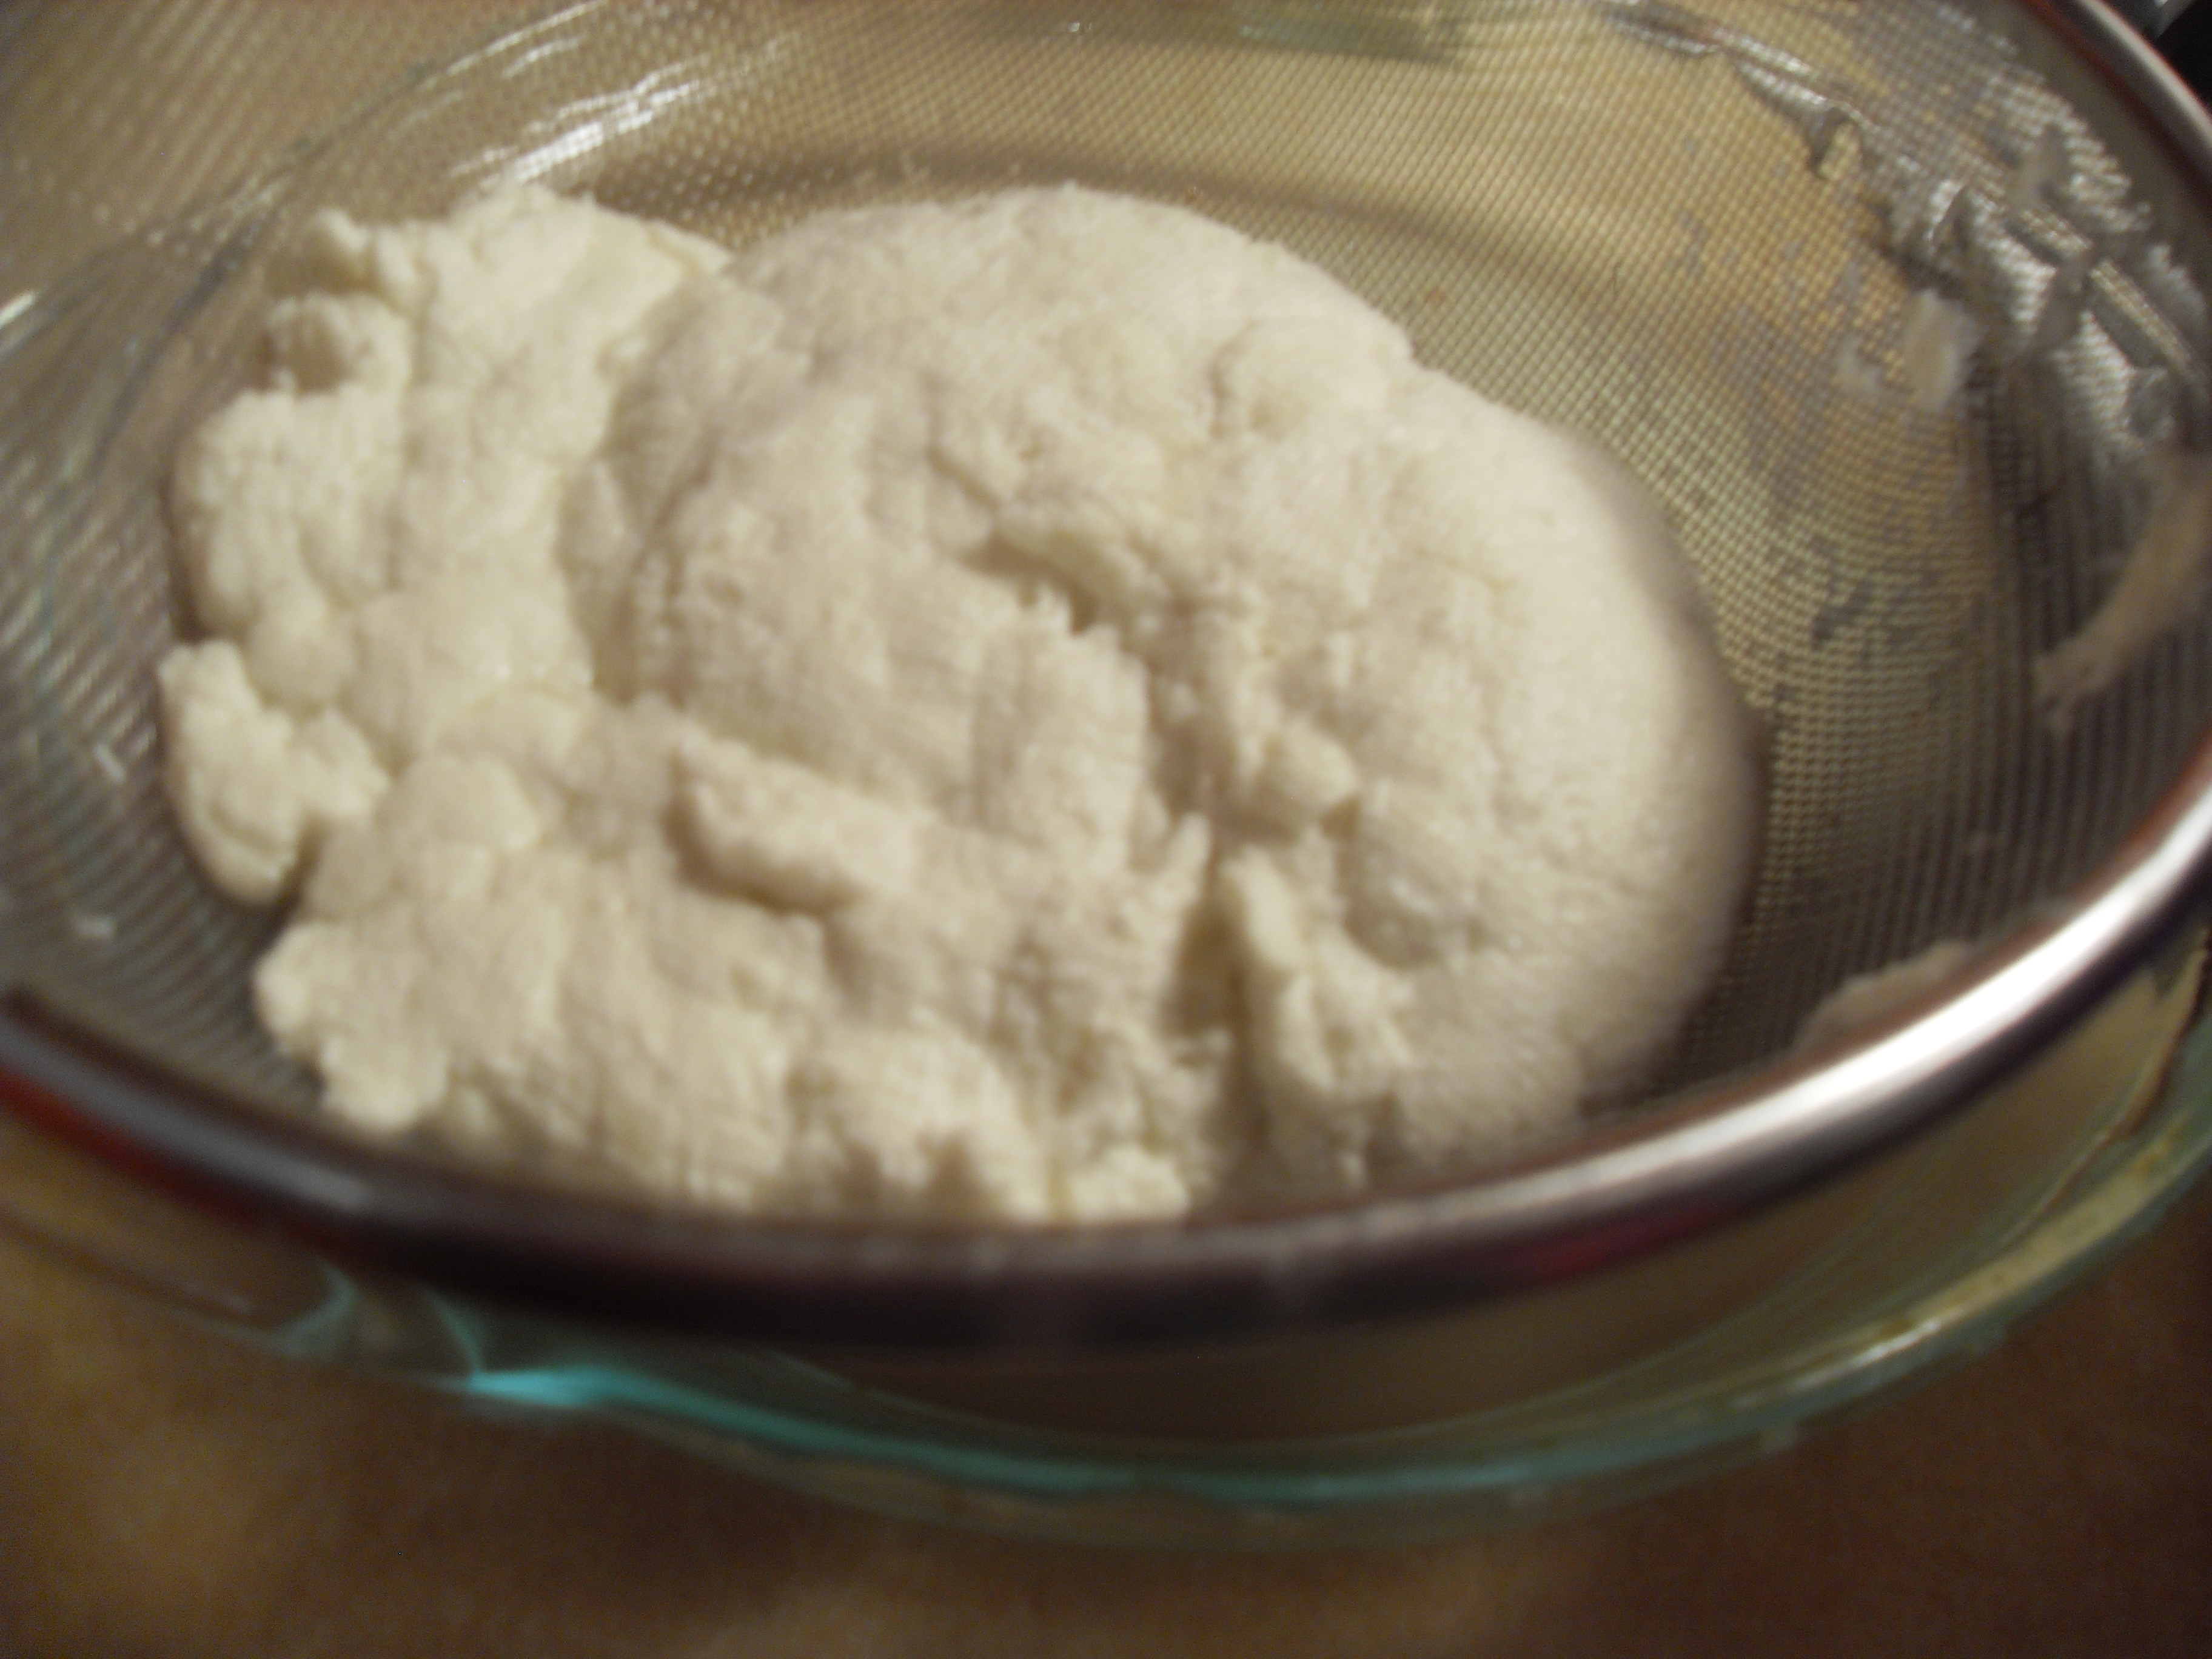
Traditionally the curds are gathered in cheesecloth and hung up to drain, a messy process. My version is much firmer so this step isn’t required. Simply drain the pot over a fine mesh colander. Let the colander drain for an hour or so, till the cheese is cool.
Then store it in the refrigerator. I keep it in a glass container. Someday I plan to add different seasonings to the milk (salt and cajun spices, for example) to create a cheese that’s flavored throughout. I haven’t gotten around to trying it yet because I use the whey. You might want to as well.

I soak grain in the whey for our chickens, a wonderful addition to their diets.
But there are plenty of other things to do with whey. Stored in your refrigerator it should last at least five days.
It makes baked goods extra fluffy. Use it instead of milk or buttermilk in breads, muffins, pancakes, and cakes. You’ll notice a difference. Use part whey along with water when you cook pasta, oatmeal, or rice. Feed it to dogs, chickens, and cats. Use it to marinate meat. Water your outdoor plants with it or dump it in your compost pile.
Let me know about your cheesemaking adventures!


Awesome information!
Thank You!
Many Blessings!
Father Time
Very cool. I’ve not yet made cheese– my dairy experiments so far have been limited to yogurt and kefir. I think I will try this soon!
Awesome, thank you for this tute + the tidbit about whey and chickens 🙂
Great post! I recognize that gorgeous cow Izzy!
I so relate on the attention required to the hard cheesemaking. I manage to get through and then let it mold because I don’t turn it often enough or not wax it soon enough or whatever. Soft, quick cheeses are much friendlier for me. Going to try your method here with our goats’ milk. We got our goats when I realized what a difficult commodity raw milk was to lay your hands on. Love having milk on tap in the barn, though. Waiting for kids at the moment–making hourly trips to the goat barn to check! It’s hard not to be obsessed!!
~Jenny~
Nothing like newborn kids. Soft, adorable, and smelling like eagerness itself. May you see them soon.
Love that!! Thank you so much for sharing!!!
Oh, now I’m longing for a flock of sheep. Or at least some Woolentales.
I love your blog. I was a goat cheese maker for 12 years and now I have become a fiber artist with my flock of Icelandic sheep. I have to reinvent myself every few years!LOL Please visit my website! Dorothy
You got me with the photo of a newborn lamb on the front page, Dorothy. And the idea of reinventing oneself will keep me dreaming all morning.
More lambs in a few days! I will post them.
Great blog! I do have a question though: Is this cheese ment to be eaten fresh (as soon as it is made) or can it be pressed using a cheese press into a cheese wheel and waxed and aged? I have a cheese press that I am in love it with, but I do not have the luxury of dairy animals and my only milk supply comes from the local super market. Thanks!
This isn’t a hard cheese. Eat it within 4-6 days. You can still make hard cheese using store bought milk, just use the cultures and follow the recipes for Cheddar or Gouda or whatever you please.
I love your blog! I find the easiest cheese ever is raw milk cream cheese, I just add starter culture to warm cow’s milk and keep it warm for a few days until it is set, then strain through cheese cloth overnight or a few hours (not too messy as my husband made me a lovely stand to hand it on). The longer you strain the harder the cheese. The whey is used in cooking/fermenting and then to the chickens if I can’t use it up. We have made a few hard cheeses, but as everyone else has commented, its SO much work compared to soft cheese. I’m looking forward to reading more of your blog now I’ve found it….
Good to make your acquaintance Liz. Sounds like we’re working toward the same goals on our little farms. I don’t think I’ve tried making cream cheese. Do you remember which starter culture?
oh neat. i didn’t know you could just use vinegar!! I will try this, thanks!
can this cheese be melted like on pizza?
Nope. You can make homemade mozarella for that. The distinctly great thing about this cheese is that it holds it’s shape, so it can be grilled or cubed or used in all sorts of ways. It also takes on flavors, so it can be rubbed with spices or marinated.
thank a million for the info. it actually worked perfectly!
Good to know that more vinegar makes a firmer cheese. I’ll try it this weekend, maybe tomorrow night. I am starting to get obsessed with making cheese these days ha!
It worked GREAT! I used lemon juice to make a paneer. Super easy, followed the directions exactly, with the exception of the end. I squeezed it in a cheesecloth, then shaped and pressed it (using a heavy cutting board with some extra weight on top, with the cheese in a large baking pan to collect the pressed out whey) to get a firmer cheese. I was told by a friend who does this often that if you leave it in the fridge for a couple of days it also gets drier (in a good way).
Glad to hear that. I’ve done the cheesecloth and pressing method too Therese. Pretty much this cheese behaves as you tell it to, sort of like bread dough once you’ve gotten comfortable with shifting around rising times to suit your schedule.
howdy,
we have been making this kinda cheese for a long time, it is been a great and easy receipe for our family. we really squeeze out all the liquid and it is a great cracker cheese. it keeps well on hikeing trips and day trips.
our family really likes it on our lasagna receipe with or without meat.
good luck to ya all on your new cooking adventures.
the early dawn ky family farm
Do you flavor it to put on crackers? It’s so bland. I’m sure it would be great with some pesto and a slice of tomato on a cracker… I’ve wondered about adding seasoning to the cheese before it settles but haven’t given it a try.
Hay, I am from Srilanka, I wanted some info about cheese making at home. I believe your recipe will serve me well. Any way I thank you so much for letting us know about it!
Kindest Regards and Good Luck!
Leonard Fernando
Sending my best wishes to Sri Lanka. Enjoy that cheese Leonard.
Hi, it’s 1:06 am and finally flipped my cheese. Reading your blog after making my first cheese(farm house cheddar) was very insightful. I was wondering when the cheese would turn yellow. But, a side from my ignorance on how to make cheese, I was even more at awe with how simple a soft cheese can be made. When my wife found out that the daddy daughter project would yield cheese in 6 months she was shocked. I tried to pull a little ricotta justice out of the whey,, but forgot to collect it when I drained the curd…. Bummer. Anyways, thanks for the insight, I now know if there is a zombie apocalypse that I will be allowed into the compound because I can make beer, cheese, and wine.
Oh, I am so excited to try my hand at this we have a dairy that sells raw mink…thanks so much
for the directions….I am off to try my cheese making kills…
Found you through pinterest! This sounds lovely scrumptious! Do you have a tutorial for the yogurt cheese? I make my own yogurt and am always looking for ways to use it. Will search your blog til I hear from you! Thank you for sharing!
Plain old yogurt cheese is simply yogurt that’s drained. We make homemade yogurt here. To thicken it I simply line a colander with quite a few layers of cheesecloth (6 to 8) or a non-nubby dishtowel (old linen ones work great). Set the colander over a larger bowl. It needs to be higher so the colander won’t be sitting in any liquids that drain out. Then plop your yogurt onto the cloth. It will drain whey slowly. You should see thin, somewhat clear liquid come out. Okay, it might be a bit white-ish. But if you see thicker white stuff come out you’re losing yogurt, and need thicker cloth. Set the whole thing in the refrigerator to drain. If you let it drain an hour or two you’ll end up with Greek yogurt. If you let it drain 10 to 12 hours, or even more, till you have a really thick product, you’ll have yogurt cheese.
You can make this into dips and spreads quite easily. You’ll notice if you beat it or add it in the mixer that it doesn’t keep it’s creamy thickness, so fold ingredients in gently. Oh, and use the whey that drained off too. Great as a liquid ingredient in pancakes, muffins, breads, etc.
I have seen in the stores packaged cheese with the words “yogurt cheese” on it that isn’t remotely yogurt cheese, but may be some marketing trick to use the word “yogurt” associated with all things healthy in the title of the cheese. I’m sure they added a few spoonfuls of yogurt to a vat of milk as they made cheese. This stuff is cultured, aged, and sliceable like colby and is NOT yogurt cheese.
happy cheesemaking!
I’m literally mAking it right now. Very excited. I was looking for an easy recipe. Yours seems super easy. Next time I’ll have to make it with the kids. We went to the farm to get our milk today which is half price to the shop. Yayayay. Also my chickens will be stoked to get some whey…maybe the cat and the dog too. Yay. Love ida
My cheese seems quite grainy…did i use too much vinegar…should i have handled it more? Like, squished it And stirred it? I’ve stuffed it in a ceramic pot in the fridge now and weighed it down. So excited to keep experimenting with this. Any tips gladly received. Thanks
Grainy? Hmmm. I wonder if it’s just normal queso blanco, but you’re expecting a smoother silkier texture like, well, cheese. Queso blanco, once cooled, should be firm enough to cut into shapes. It may crumble a bit, and the texture is sort of bumbly and rumply. If mozarella is a baby’s butt, queso blanco is your grandmother’s hands.
Hmm. I think you’re expecting queso blanco to be as smooth as cheeses such as cheddar. It’s rougher and bumblier, more a wool blanket than a silk scarf. It doesn’t improve from handling. More draining will make it firmer. Squishing is also possible, it will be firmer yet but not any smoother. It it’s tasty or all that appealing on it’s own, as I mentioned. It needs to be cut up into cute little cubes, salted, and cooked in a soup. Or seasoned and roasted in oil till it’s brown and crispy. Or marinated with spices and oils and grilled. Then grainy just seems hearty and the word “cheese” takes on a new definition.
So my first batch turned out fine once it had been squished. My daughter (3) was so excited to eat it…then spat it out and said she’d prefer it fried. She liked it fried, but didn’t like it as much as haloumi. My next batch I made with her and used lemon juice instead of malt vinegar and I sprinkled a little salt on top. She so enjoyed seeing and being involved in the process (and getting the raw milk from the farm). We’ve just eaten it tonight…it tasted sooo good uncooked..like a cheesylemoncake-delight. My daughter said she’d probably like it better cooked. My son (1) was just so hungry he wolfed a little bit down. We fried it and had it with dinner. My son would spit it out, but then i broke it up into smaller bits and he loved it. My daughter loved eating the ‘burnt’ bits and left the middle parts for me. I’m just making another batch..this time more of it and I’ve added some salt to the milk and used cider vinegar I found in the cupboard. I’ve got a new dish to squish it in and I’m gonna put something heavier on top. So exciting this cheesemaking. I hope it goes alright….I’ve just finished my batch of feijoa chutney and I’m a bit concerned I may have forgotten to add sugar (I dropped a whole bag of raw sugar in the kitchen when I was making it..potentially the clean up may have distracted me from actually adding the sugar…bummer…cuz feijoa chutney is delicious..well, I can always add the sugar later). Been a long week with my hubby away and my daughter being sick. But when I eat my cheese tomorrow I’ll be happy :o) I look forward to reading the rest of your blog when I get the change. Thanks x
Hello,
I just bought some organic milk from the market so will try this cheese-it looks so versatile!
Question: will the resulting whey taste strongly of vinegar? Or does it boil off? Someone mentioned a lemon juice version. How much lemon juice?
Also, I’ve been making yogurt for 36 years (thanks Salton), and have always made my own cream cheese from it -used in cheese cakes and wherever else cream cheese is used. Instead of cheese cloth you can use a coffee filter. I simply put 2 cups of yogurt into one filter inside a small strainer and suspend this over a bowl-covered- in the fridge for 12 hours or so. If I need a quantity, I freeze batches until there is enough.
The resulting cheese doesn’t taste just like the milk it’s made from, nor does it taste exactly like vinegar, but something in-between. I don’t find it vinegar-y at all.
I don’t know how lemon juice differs from vinegar in acidity. The great thing about this recipe is you can add vinegar or lemon juice just until you see the reaction I mention, when the proteins separate leaving a green-ish liquid. It takes a few moments, so be patient. Add more if you need it. Some recipes use quite a bit less, so experiment to see what works for you.
Your method for yougurt cheese sounds great. I’m not always a fan of having my food in contact with paper, especially bleached paper. Now we get unbleached coffee filters so I’ll have to give this a try, thanks Mairi!
Glad it’s working somewhat. When we fry it up we cut it in smallish pieces first, then toss it with salt and spices, then fry it in a little coconut or rice bran oil. Yum. I only tried it plain once. Yuck.
Just made it infused with Earl Grey Tea, amazing!!!
Wow! That sounds scrumptious 😋!!
Ur recipe was simple interesting and educational thought it be harder try I can try some rustic early american culture thanx
Made this with my five year old son. Did a half gallon or 3.5% milk and 5 oz of white vinegar. In about 90 minutes we made about three 12oz jars of cheese. I added about 1/4 tsp of sea salt and spices to each jar. We made “Onion”, “Italian Herb and Garlic” and “Cayenne and Bell Pepper”. We also have 2 jars of whey to make pancakes or muffins with. Thanks for the instructions, we also used 4 layers of cheese cloth to collect the curds.
Hi, this is the first time I’ve read your blog and I really like it. I’m considering making cheese from unpasturized raw cow’s milk to get the whey. Won’t heating the milk to 180 degrees kill bacteria from the grain/grass eating bovine’s gut that you want to get into the carnivorous gut flora of the chicken? The way i understand the three fold benefit of soaking the grain for the girls prior to feeding them is to increase the protein of the feed, disarm the antinutrientials and enable the bird’s intestine to better utilize a grain based diet rather the a worm/bug based diet. i do pasture my birds so they get some meat from bugs but i want to increase their diet’s efficiency because they seem through so much of their feed away in the course of getting at what they want. So, I’m considering a mesophilic starter approach that heats the raw milk to not more than 100 degrees then taking those curds to make a hard cheddar. But, I’m not a cheese maker and only two years into being a chicken feeder. Thanks for any opinion or imput that have.
Mike
You’re right Mike, the high temp starts to pasteurize the milk. The whey is still brimming with protein and nutrients but not so much the beneficial bacteria. You can get whey from raw milk simply by letting it sit out in a loosely sealed wide-mouthed jar. In a few days the milk will curdle and the whey will be visible as a somewhat clear liquid at the bottom of the jar. Line a fine sieve with several layers of cheesecloth or a tea towel and drain the solids from the curds. Once most of the whey has dripped out, usually an hour or more, tie the cheesecloth/towel and hang (I usually loop it around a cupboard handle). It can hang a few hours or overnight. Label the whey and store in the fridge. The solids are nicely cultured and can be used in other recipes (spread on pancakes and topped with homemade preserves, for example) but don’t last as long as the whey. (Don’t try this with pasteurized milk, it spoils rather than cultures.)
Using a starter that requires no more than 100 degree heat is a great way to extract the whey. You don’t have to go to the trouble of making cheddar. Heat up the curds after the whey is out to make cheese curds (fried cheese curds!) or salt them and press them to make a homemade farmer’s cheese.
Hi, I wanted to let you know how easy it is to add spices. We are lucky enough to have access to a goat share program and are currently getting 3 gallons of raw milk a week. Gives plenty to experiment with. 🙂 Anyway, all I did was shake in some dried chili flakes into the cheese just before boiling and before I poured vinegar in. It is very easy to do. I didn’t measure, just tossed some in, stirred and then poured vinegar in.
Thanks Michelle. I’ve started doing that too.
Reblogged this on Eccentric and Bent and commented:
I have been on a food adventure lately. Today was looking for cola cake recipes. Most of them called for buttermilk, so that started me on a journey for buttermilk recipes. One was mixing 1 3/4 tsp of cream of tartar with milk and letting it sit 5-10 minutes. I figure I will use that recipe so that I can use this container of cream of tartar. I bought it last year to make something and I have not used it since. But most milk curdling recipes called for a tablespoon of lemon juice or white vinegar. Trying to figure out if apple cider vinegar would work too led me to this blog post about making cheese. I had been looking for easy homemade cheese recipes but most of them required rennet and mail order bacteria. Those were not investments I felt comfortable making as a curious beginner. I mean I had all sorts of wonderful baking plans for the cream of tartar and I only used it once. At least it was only a couple of bucks. Anyway, this recipe takes away my fear of not being frugal so i think I’ll try this. I’ll let you know how it turns out unless you make it first. And in that case, let me know what pitfalls to avoid. And as one of my favorite chefs is fond of saying, Happy Cooking!
I made some cheese this way last night but mine is kinda crumbly. After straining the cheese and getting the moisture out I broke it up in pieces and sprinkled Garlic powder and Himalayan salt on it. I tried to press it back together but it crumbled. It was good any ways but hard to eat!!!
Usually it’s pretty firm. Varying moisture content can make this and any cheese have a range of textures.
This is a great webpage. I work with special needs students, studying how cattle help humans. I’m excited to try your recipe in class.
I’m excited to try this out and share the results!
Just found this site and I’m SO excited! Currently have an unlimited source of raw milk from friends have been dumping over half their milk (Their cow is giving 8-10 gallons a day, and they can’t find enough people to give it to) So I’m going to be in milk heaven, yogurt, butter, keefer, and now cheese. Thanks so much for these great ideas.
I’m appalled that they’re dumping this wonderful milk! There are different regulations in different states, but there are still options:
They could consider a cow share (sort of like a CSA for dairy).
Connect with people eager to buy their milk through a local chapter of the (Weston Price Foundation http://www.westonaprice.org/local-chapters/find-local-chapter
At the very least, sell it to a pig farmer who’d use it as feed.
Most important, change the way they’re raising the cow. Our cow doesn’t give more milk than we can use because we keep her calf WITH her. We only separate them at night, tucking the calf in a stall next to her mom while her mom has free range of the barn and pastures. Early in the morning we milk, then reunite them. No afternoon milking and a happier, healthier calf.
this is the bestest ever thank-you so much first time ever and now im going to try all kinds of different ingredients to add to it AWSOME!!
I just made it. It worked, but it was crumbly and… i’d say, grainy… I was expecting something smoothier, but its cool 🙂 Also added pepper, basil and garlic. Maybe the garlic did it?
It’s a little rough-textured, not smooth and glossy cheese like mozzarella. Maybe the garlic made it a bit crumbly but I bet it made it taste amazing.
Your procedure is the simplest and easiest one to follow. Tried this today, and it worked great. Thank you! (:
Does this cheese have a name?
Sorry, it’s queso blanco (also called paneer when made with lemon juice).
If you hang it for an hour in a colander what happens to the curds?
When you use the whey in baking and cooking can you taste the vinegar?
I don’t think so. It’s softened by the flour and butter in most recipes. Entirely worth it for the fluffy results.
This is a really was no hassles cheese recipe thankyou. All the others on internet are bit difficult confusing and dam right time taking . I had no idea rice vinegar could be used to make farmers style cheese. Can u use normal dark vinegar for cheese making!
if i only have aluminium pots , i will have to buy a new one to make cheese ?
or is there a way to work it out with aluminium pot ?
Thanks for this awesome guide !
I don’t know the answer to this. Perhaps you could try a batch in an aluminum pot?
I gave up all my aluminum pots a long time ago because I was concerned about the possible negative health effects of food cooked in them. I didn’t toss them out, that’s not in my DNA. Instead they’re on my porch with flowers planted in them. They were my grandmother’s big pots, mostly used for canning, and I’m glad to see them still in use.